
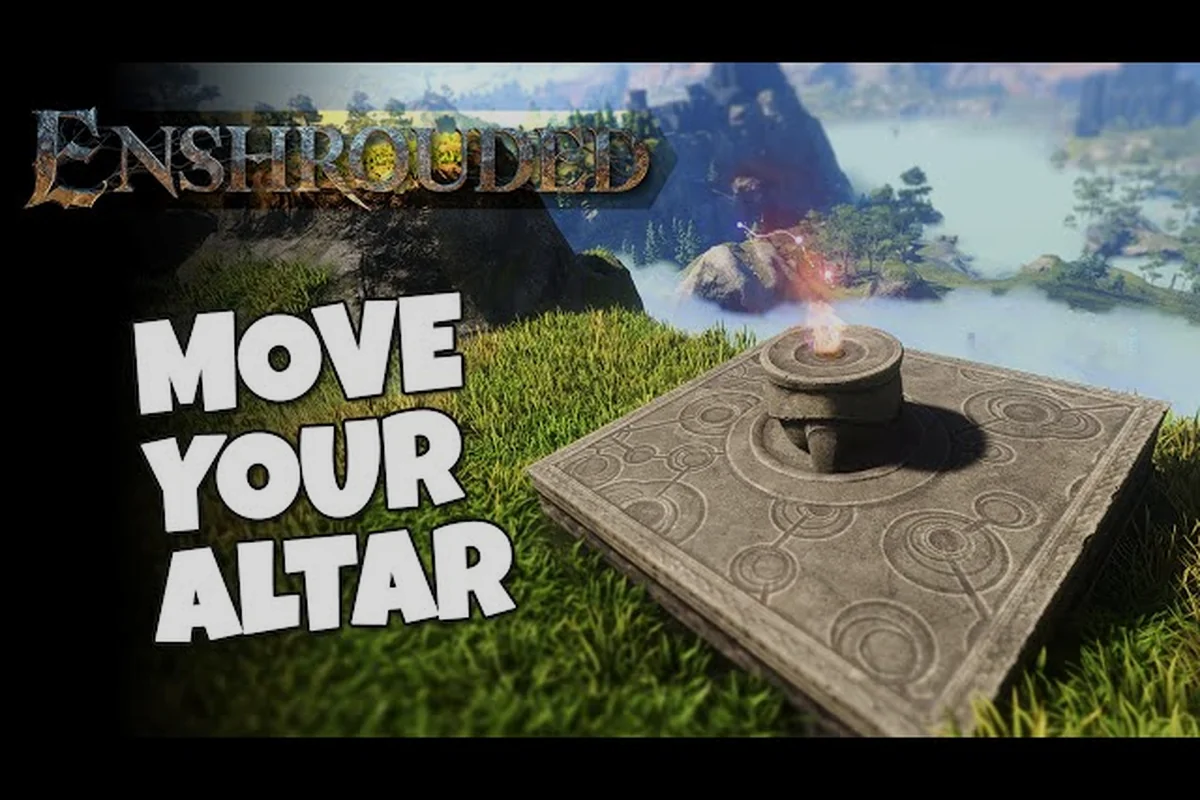
The Flame Altar is the single most important object in Enshrouded, because it decides where you can build, how long you can breathe inside the Shroud, and how far you can push into Embervale before the fog wins. This Enshrouded flame altar guide walks through Flame levels, upgrade costs, and the Shroud timer so you stop dying to a clock you never understood.
According to the official Enshrouded Steam news updates, the Flame Altar's upgrade requirements and the resources needed to expand your base's build radius are periodically adjusted by the developers, so it's worth checking the Keen Games' Enshrouded news hub for the latest balance changes before committing to a large resource grind.
What the Flame Altar Actually Does
Every playthrough begins when you place your first Flame Altar, and that single object quietly governs three separate systems at once. It defines your build zone, it anchors your respawn point, and it sets the Shroud duration your character can survive before the fog starts draining health. New players often treat it as decoration and then wonder why they cannot place walls on a hill they just cleared.
The altar is also a fast-travel node. Once you have placed several, you can teleport between them from the map, which turns a sprawling world into a manageable network of outposts. According to the official Enshrouded store page, the game is built around solo and co-op survival in a hand-crafted world, and the altar network is what makes that world navigable rather than exhausting.
Here is the basic breakdown of what a single altar controls: the build zone radius (roughly 40 meters at Flame Level 1, expanding with each upgrade), your respawn anchor so death returns you to your gear rather than the starting camp, the Shroud timer extension that adds survival seconds whenever you stand inside the altar's glow, the fast travel node you unlock on the map, and crafting access — every workbench and station must sit inside the boundary or it stops functioning entirely.
| System | What the Altar Sets | Why It Matters |
|---|---|---|
| Build zone | Radius where you can place blocks and stations | You cannot build outside the glowing boundary |
| Respawn anchor | Where you revive after death | Keeps you near your gear instead of the starting camp |
| Shroud timer | Extra seconds of Shroud time near the altar | Directly affects how deep you can explore |
| Fast travel | Map teleport destination | Cuts travel time between regions |
| Crafting access | Stations must sit inside the zone | Workbenches stop functioning outside it |
The build zone boundary is the one that frustrates people most, because it is invisible until you try to place something. If a wall refuses to snap into position, you are almost certainly standing a few meters outside your altar radius rather than hitting a bug.
Why the First Altar Placement Matters
Your opening altar placement locks in your early game more than any weapon choice, because moving it later costs resources and time. A good first altar sits near water, flat ground, and a resource cluster, ideally on the edge of the Low Meadows where you can expand outward without fighting terrain.
Community reports consistently suggest that new players who place their first altar on a hilltop regret it, since terraforming a slope into a usable floor takes far longer than starting on level ground. If you want a deeper walkthrough of that opening hour, the beginner guide covers the first steps in order.
The Altar Is Not Just a Campfire
It is tempting to think of the altar as a save point and nothing more, but the Shroud timer link is what separates Enshrouded from other survival games. Standing inside your altar's influence gives you more breathing room in the fog, which means a well-placed altar is effectively a forward operating base for Shroud runs rather than a cozy home.
How to Upgrade the Flame Altar Step by Step
Learning how to upgrade the flame altar is the core progression loop of base building, and it is gated behind a resource called Shroud Cores plus a handful of other materials. Each Flame level raises your build radius, your Shroud time, and eventually the number of altars you can place in the world.
The upgrade process itself is simple once you know where to look: interact with the Flame Altar, feed it the listed Shroud Cores and materials, and confirm. What matters is timing — upgrading the moment you have enough cores raises your build radius and Shroud timer before your next excursion, while stockpiling cores past a level's requirement just delays the radius expansion that lets you place a new workbench or kiln.
-
Walk up to your Flame Altar and interact with it to open the upgrade prompt.
-
Check the required materials — early levels want Shroud Cores, Wood Logs, and Stone, while later levels demand rarer drops.
-
Confirm the upgrade and watch the altar flare brighter as the radius expands.
-
Re-check your build zone, because the boundary moves outward and previously blocked ground becomes usable.
-
Repeat as you gather more cores, ideally after each major Shroud excursion.
Shroud Cores come from Shroud Roots, the twisted growths you find inside fogged regions. Cutting one down clears the fog locally and drops cores, which is why clearing roots and upgrading your flame are the same activity viewed from two angles. Players who ignore roots hit a wall around Flame level 3 and cannot figure out why their base stopped growing.
| Flame Level | Typical Cost Focus | Main Unlock |
|---|---|---|
| Level 1 | Starting placement | Basic build zone and respawn |
| Level 2 | Shroud Cores, Wood | Slightly larger radius |
| Level 3 | Shroud Cores, Stone | Noticeable Shroud time gain |
| Level 4 | Cores, refined materials | Bigger footprint for stations |
| Level 5+ | Rare drops, Cores | Additional altar slots and armor tier unlocks |
One detail worth flagging: the 1.0 changelog notes that Flame upgrades now automatically unlock the armor sets of the following crafting tier, so you no longer miss recipes by skipping a resource or quest. That change makes upgrading the flame a direct power spike rather than a purely structural one.
Where to Farm Shroud Cores Efficiently
Cores drop from Shroud Roots, and roots cluster in specific fogged pockets rather than appearing randomly. A practical route is to clear roots near your base first, then push outward one region at a time, returning to upgrade whenever you have enough cores for the next level.
Because Shroud time is limited, treat each root run as a timed errand. Enter, find the root, cut it, grab the chest nearby, and leave before your timer runs dry. The gear salvage guide is useful here, since salvaging junk drops keeps your inventory clear for cores and chest loot.
Reading the Upgrade Prompt Correctly
The upgrade menu shows exactly which materials you are missing, and it greys out the confirm button until you have them all. If the button is dark, do not assume the altar is bugged — check the list, because a single missing core is the usual culprit.
Enshrouded Shroud Timer Explained
The Shroud timer is the mechanic that kills more new players than any boss, and understanding it turns the fog from a death sentence into a manageable resource. When you step into a Shrouded area, a timer begins counting down, and once it hits zero your character starts taking continuous damage until you leave or die.
Standing inside your Flame Altar's radius extends that timer, which is why forward altars matter so much. The timer is not a hard wall — it is a budget, and every second you spend looting is a second you cannot spend fighting.
| Timer State | What Happens | Best Response |
|---|---|---|
| Full timer | Safe exploration | Push toward your objective |
| Half timer | Warning cues appear | Start planning your exit |
| Low timer | Screen darkens, tension rises | Head for the boundary now |
| Zero timer | Continuous health drain | Sprint out or use an Elixir Well |
Elixir Wells act as free Shroud time and respawn anchors inside fogged zones, so tagging one early in a run gives you a safety net. If you are new to the mechanic, the broader Shroud survival breakdown pairs well with this section, since base placement and Shroud routing are deeply connected.
How to Survive the Shroud Without Panicking
Surviving the Shroud is mostly about preparation rather than reflexes, because the Shroud timer is a hard countdown that no amount of dodging can pause. Before you leave your Flame Altar, craft a stack of Grilled Wolf Meat or another food buff for the extra health and stamina, and bind a Health Potion to a quick slot so you never fumble through the radial menu mid-fight. The single biggest mistake is chaining runs: if you re-enter the Shroud with a nearly empty timer left over from a previous excursion, you will hit zero inside the fog and lose everything you are carrying. Treat each run as a fresh timer — bank your loot, wait out the reset, then go back in at full duration.
A few habits that consistently save runs: keep the Shroud timer visible at the top of your HUD and treat 25% as your hard turn-back point, since the final stretch of fog between you and the boundary is where most full-loot deaths happen. If you are running a Flame Altar at level 3 or 4, remember that upgrading the altar raises your Shroud duration, so the same route that felt tight at level 2 suddenly has breathing room. Pair that with a Shroud Root cleared early and an Elixir Well tagged on the way in, and you convert a panicked sprint into a repeatable loot loop instead of gambling your inventory every trip.
-
Tag the nearest Elixir Well before looting anything.
-
Clear the Shroud Root first, because the fog lifts and your route becomes visible.
-
Leave a marker on the map at the boundary so you know which way is out.
-
Do not fight optional enemies when your timer is below a quarter.
-
Bank your loot at an altar before attempting a second run.
The community wiki documents the Shroud as a thick fog layer covering parts of Embervale, filled with hostile creatures but also holding valuable loot and chests that regenerate over time. That regeneration is the reason repeated Shroud runs stay worthwhile rather than becoming one-and-done.
What Happens When the Timer Runs Out
Once the timer expires, your health drains steadily and the screen darkens, which is your cue to sprint for the nearest boundary or Elixir Well. Dying inside the Shroud drops you back at your altar, and recovering your gear means walking back into the same fog — so the smart play is always to leave early rather than gamble on one more chest.
Flame Levels and Build Zone Expansion
Flame levels do more than extend your timer; they physically enlarge the ground you are allowed to build on. Each upgrade pushes the invisible boundary outward, which means a base that felt cramped at level 2 can suddenly absorb a full crafting hall at level 4.
This is why experienced builders upgrade the flame before decorating. There is no point arranging furniture in a room you are about to outgrow, and there is no point building a wall that will sit outside the new boundary once the radius shifts. The dedicated Flame Altar size upgrade guide digs into the radius math and storage implications if you want the full picture.
| Build Priority | Upgrade First? | Reason |
|---|---|---|
| Crafting stations | Yes | They must sit inside the zone to function |
| Storage chests | Yes | Consolidation saves constant trips |
| Decorative props | No | Wait until the radius stops growing |
| Outer walls | No | They may fall outside the new boundary |
| Farm plots | Sometimes | Only once you have steady water access |
How Many Altars Can You Place?
The 1.0 changelog confirms that unlocking Flame level 11 raises the maximum number of Flame Altars in the world to 16, and most areas previously marked as no-build zones are now fully accessible for player-built bases. That is a dramatic change from early access, where altar counts were tightly capped and large swaths of the map refused construction entirely.
In practice, 16 altars means you can run a main base, several resource outposts, and a handful of forward Shroud camps without ever feeling squeezed. The strategic question shifts from "where can I build" to "which outposts are actually worth maintaining."
Choosing Between a Main Base and Outposts
A main base should hold your crafting stations, storage, and survivor housing, while outposts exist purely to shorten travel and extend Shroud reach. Outposts do not need walls or decoration — a single altar, a chest, and a bed are often enough to justify the slot.
Practical Flame Altar Tips for Deeper Runs
The gap between a smooth playthrough and a frustrating one usually comes down to a handful of habits around the altar — and most of them trace back to the Shroud timer. Every second spent outside a Flame Altar's radius drains that timer, and once it hits zero you take escalating Shroud damage until you die or reach safety. That is why a misplaced altar or a delayed Flame upgrade snowballs so fast: you are not just losing convenience, you are losing the buffer that lets you explore, fight, and retreat on your own terms. The habits below are simple, but each one protects that buffer.
-
Upgrade before you expand. A bigger radius prevents wasted building.
-
Place forward altars near Shroud boundaries. They extend your timer exactly where you need it.
-
Keep one altar near a water source. Farming and cooking both depend on it.
-
Do not hoard cores. Sitting on 20 Shroud Cores while your flame stalls at level 3 is a self-inflicted bottleneck.
-
Re-check boundaries after every upgrade. The zone moves, and old walls may end up outside it.
-
Use altars as fast-travel hubs. Teleporting beats walking every time.
The 1.0 update also opened up most former no-build zones, so locations that were useless in early access are now prime real estate. If you are scouting a new region, the farm base layout guide explains how to judge terrain before committing an altar slot.
Matching Altar Placement to Your Playstyle
Solo players benefit from fewer, better-defended altars, because defending multiple outposts alone is exhausting. Co-op groups can afford to spread altars widely, since one player can hold a forward camp while others gather. Either way, the altar network should mirror how you actually move through the world rather than how you imagine you will.
Common Altar Mistakes Worth Avoiding
The most common mistake is placing an altar for aesthetics and then discovering the terrain is unusable for building. The second is forgetting that stations outside the zone simply stop working, which leads to confusing "broken" workbenches. The third is never upgrading, which caps both your Shroud time and your build space at the exact moment you need them most.
Frequently Asked Questions
How do I upgrade the Flame Altar in Enshrouded?
Interact with the altar to open the upgrade prompt, then supply the listed materials — usually Shroud Cores plus wood or stone. Confirm the upgrade and the radius, Shroud time, and altar capacity all increase. Cores come from cutting down Shroud Roots inside fogged regions.
What does the Shroud timer actually do?
The timer counts down while you stand inside Shrouded areas, and once it reaches zero your health drains continuously until you exit or die. Standing within your Flame Altar's radius extends the timer, and Elixir Wells provide extra Shroud time as well as respawn anchors.
How many Flame Altars can I place?
After the 1.0 update, reaching Flame level 11 raises the maximum number of altars in the world to 16, according to the official changelog. Most areas previously flagged as no-build zones are now open for construction, so altar slots are far less restrictive than they were in early access.
Do Flame upgrades unlock anything besides build space?
Yes. The 1.0 changelog states that Flame upgrades now automatically unlock the armor sets of the following crafting tier, so you no longer miss recipes by skipping a resource or quest. That makes each upgrade both a structural and a gear progression step.
Why can't I build in an area that looks clear?
You are almost certainly outside your altar's build radius rather than hitting a bug. The boundary is invisible, so walk back toward the altar and try again. Upgrading the flame expands the radius and makes previously blocked ground usable.
Final Thoughts on Flame Altars and Shroud Survival
The Flame Altar ties together building, respawning, fast travel, and Shroud time into one system, which is why upgrading it early pays off across every other activity in Embervale. Raise your Flame levels whenever you have cores, place forward altars near Shroud boundaries, and treat the timer as a budget rather than a threat. Do those three things and the fog stops being the thing that kills you.