
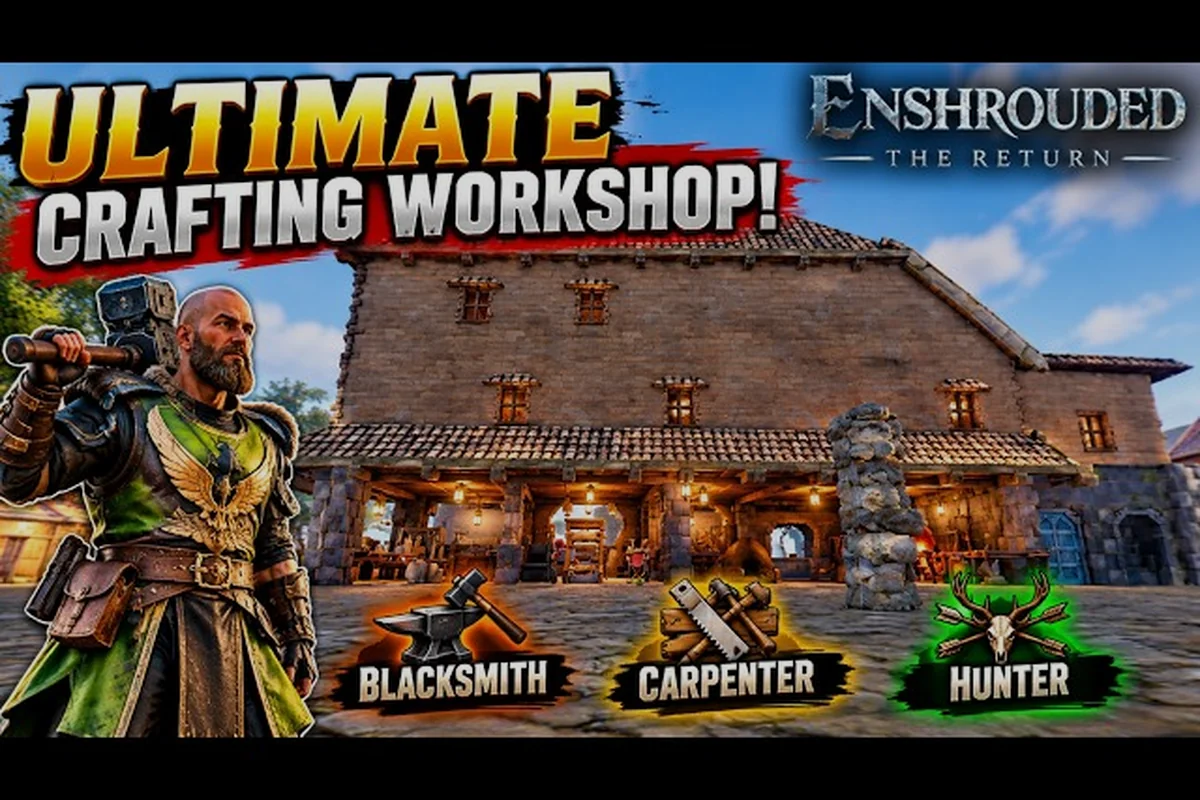
Rescuing Cade Hawthorn is only half the job — the real payoff comes when you understand which crafting stations he unlocks and how they chain into your forge and smelter. This Enshrouded carpenter guide walks through every bench, what feeds it, and the order that keeps your base humming instead of stalling.
According to the the official Enshrouded news feed on Steam, the Carpenter unlocks after you rescue him from the Revelwood and provide him with a proper workshop, after which he can craft refined building materials and furniture from processed wood.
What the Carpenter Actually Unlocks
Cade Hawthorn is the survivor who turns raw logs into the building blocks of every base you will ever raise. Players who rush past him often hit a wall around the Revelwood tier, because almost every advanced station in the game traces its recipe list back to something the carpenter produces. According to the official Steam page, Enshrouded blends voxel building with survivor rescue, and the carpenter sits at the exact intersection of those two systems.
The carpenter's core output is refined wood products: planks, shingles, beams, and the shaped blocks used in furniture and structural pieces. None of it looks exciting on its own, but it is the raw material for the workbenches that follow.
Here is what the carpenter station produces and where each item typically goes: Wood Planks anchor your first Workbench and every manual crafting recipe that follows, Wood Shingles cover roofs and decorative trim, Wood Beams carry the load of multi-story builds and scaffolding, and Shaped Wood Blocks stock the Collector and farmer benches. The kiln-driven Charcoal line deserves special attention, since it fuels the Forge and Smelter long before better fuel sources appear.
| Carpenter Output | Primary Use | Feeds Into |
|---|---|---|
| Wood Planks | Walls, floors, basic furniture | Workbench, manual crafting |
| Wood Shingles | Roofing, decorative trim | Base building |
| Wood Beams | Structural frames, scaffolding | Multi-story builds |
| Shaped Wood Blocks | Furniture, storage chests | Collector, farmer benches |
| Charcoal (via kiln) | Fuel, smelting | Forge and smelter |
The Charcoal line matters more than most new players realize. Every forge and smelter in the game burns fuel, and charcoal from a carpenter-fed kiln is the cheapest sustainable source before you unlock better options. Each kiln cycle converts raw logs into charcoal at a steady rate, so keeping one running beside your Forge means you are never caught mid-smelt without fuel. Skipping it forces you to scavenge burnable loot in the Revelwood, which slows your enshrouded forge and smelter guide progression and delays the blast furnace tier where metal production really opens up. Stockpile charcoal early and your entire crafting chain, from manual crafting benches to the Collector, keeps moving without interruption.
Why the Carpenter Comes First
Your progression order should almost always be carpenter, then blacksmith, then the specialist benches. The reason is simple: the blacksmith's forge needs refined materials that only exist once the carpenter is running. Skipping ahead means standing at a forge with an empty inventory and no way to craft the bars you need. If you have not located him yet, the process of tracking down survivors and giving them a bed is covered in the guide to finding the carpenter and other NPCs, which pairs well with this crafting breakdown.
The Hunter Workshop and Its Role in Crafting
The hunter workshop is the second pillar of your production line, and it is easy to undervalue because it looks like a combat station. In practice, the hunter bench supplies leather, sinew, and treated hides that several armor recipes and the collector's catalog both depend on.
Athalan Skree runs the hunter workshop once rescued, and his station unlocks a chain of animal-processing recipes. You bring in raw pelts and bones from hunting trips, and the bench converts them into materials that no other station can produce.
Key hunter workshop outputs include Treated Leather, Sinew Cord, Cured Hide, and Bone Fragments — four materials that feed directly into armor, ranged weapon, and collector catalog recipes. The practical reason to keep Athalan Skree's bench running is that Treated Leather alone gates most light and medium armor upgrades, while Sinew Cord is a hard requirement for every bow and crossbow you will craft. Bone Fragments are the quiet bottleneck: they appear as a secondary ingredient in several weapon recipes, so stockpiling them early saves a return trip to the bench later.
-
Treated Leather — the backbone of light and medium armor sets
-
Sinew Cord — used in bows, crossbows, and some tools
-
Cured Hide — required for collector catalog entries
-
Bone Fragments — a secondary ingredient in several weapon recipes
The hunter workshop also gates a handful of consumables that improve ranged combat, which is why players who main a ranger build tend to prioritize it right after the carpenter. The two stations complement each other: the carpenter builds the frame, the hunter supplies the flexible components.
Hunter vs Carpenter: Which to Upgrade First
If you are short on resources and can only push one station to the next tier, the answer depends on your immediate goal. Building a new base section? Carpenter. Crafting a full armor set? Hunter. The table below breaks down the trade-off.
| Situation | Priority Station | Why |
|---|---|---|
| Expanding base footprint | Carpenter | Unlocks structural blocks and furniture |
| Crafting armor upgrades | Hunter Workshop | Supplies treated leather and sinew |
| Preparing for Shroud runs | Both | Need gear plus repair materials |
| Stockpiling fuel | Carpenter (kiln) | Charcoal production |
In most playthroughs the smart move is to keep both stations at roughly the same tier so neither becomes a bottleneck. A carpenter two tiers ahead of your hunter just means you have plenty of planks and no leather to finish the armor those planks were meant to protect.
Farmer Workshop, Collector Guide, and Manual Crafting
The farmer workshop and the collector bench round out the specialist production loop, and both feed directly into the consumable economy that keeps you alive in the Shroud. Emily Fray handles farming, while the collector organizes rare finds into catalog entries that unlock recipes and rewards.
The farmer workshop produces seeds, soil treatments, and processed crops. Its most valuable output is not food itself but the growing materials that let you sustain a renewable supply of ingredients for cooking and alchemy. A well-run farm means you never have to scavenge for basic reagents again.
The collector works differently. Instead of producing items, the collector bench lets you hand in discovered relics, rare plants, and curiosities. Each completed catalog entry typically rewards a recipe, a cosmetic, or a resource bundle. Community reports suggest the collector is the most commonly neglected station, which is a shame because several mid-game recipes are locked behind catalog completion.
Manual crafting ties all of this together. The manual crafting menu is where you assemble items that do not need a dedicated station — bandages, torches, basic tools, and repair kits. It draws from the same material pool as your benches, so a stocked carpenter and hunter make manual crafting far less painful.
| Station | Owner | Core Output | Best For |
|---|---|---|---|
| Carpenter | Cade Hawthorn | Planks, beams, charcoal | Base building, fuel |
| Hunter Workshop | Athalan Skree | Leather, sinew, hides | Armor, ranged gear |
| Farmer Workshop | Emily Fray | Seeds, soil, crops | Food, alchemy reagents |
| Collector | Collector NPC | Catalog rewards | Recipes, cosmetics |
| Manual Crafting | Player | Bandages, torches, kits | Field repairs, utility |
Keeping the Loop Balanced
A common mistake is over-investing in one station while starving the others. Because every bench draws from the same shared storage, an imbalance shows up fast: you will have stacks of planks and zero leather, or a thriving farm and no charcoal to smelt ore. The fix is to assign a rough budget to each station every time you return from an expedition, topping up whichever bench is running lowest.
The beginner progression guide covers the early resource rhythm in more detail, but the short version is: gather broadly, craft narrowly, and never let one station sit idle for long. In practice that means running your Carpenter, Hunter, and Farmer workshops on staggered timers so the Carpenter's plank and shroud-wood output feeds directly into the Forge and Smelter queue, while the Farmer keeps charcoal and plant fiber stocked for the Blast Furnace. If the Carpenter stalls waiting on logs, your entire manual crafting chain backs up behind it, so treat the sawbench as the pacing item and top it up first on every return trip.
Forge and Smelter: Turning Ore Into Gear
The forge and smelter are where your carpenter and hunter output finally becomes weapons and armor. The forge shapes metal into blades, tools, and heavy armor plates, while the smelter converts raw ore into ingots. Neither works without fuel, and that is where your charcoal supply earns its keep.
The smelter's job is straightforward: feed it ore plus fuel, receive ingots. The forge then takes those ingots and produces finished goods. Players who try to run a forge without a smelter quickly discover they are missing the intermediate step, because most forge recipes require ingots rather than raw ore.
Core forge and smelter recipes include: Copper Ingot (2 Copper Ore + 1 Charcoal), Iron Ingot (2 Iron Ore + 1 Charcoal), Bronze Ingot (1 Copper Ingot + 1 Tin Ore), and Steel Ingot (1 Iron Ingot + 1 Coal), with each smelt consuming one unit of fuel per cycle. Copper and iron ingots unlock the earliest forge tools and armor plates, while bronze gates several tier-two recipes and steel is reserved for late-game gear and station upgrades. Note that steel is the only ingot requiring Coal rather than Charcoal, so players pushing into the Shroud's later regions should stockpile both fuel types before committing to a Blast Furnace build.
-
Copper Ingot — early tools and basic armor
-
Iron Ingot — mid-game weapons and heavy armor
-
Bronze Ingot — alloy used in several tier-two recipes
-
Steel Ingot — late-game gear and station upgrades
Fuel efficiency matters here because every smelt — whether it is a Copper Ingot, Iron Ingot, or the coal-hungry Steel Ingot — consumes exactly one unit of fuel per cycle, so a kiln that idles between batches is a kiln that quietly drains your stockpile. A carpenter feeding the kiln a steady stream of Charcoal from the Kiln keeps both the forge and smelter running without interruption, which matters most once you unlock the Blast Furnace and its higher fuel demands. Skip that supply line and you will spend more time chopping wood for the Kiln than actually crafting gear, turning what should be a smooth progression curve into a constant scavenging loop.
Smelter Fuel Comparison
Different fuels burn at different rates, and choosing the wrong one wastes materials you could have spent elsewhere. In the early game, before you unlock the Blast Furnace, your only smelting option is the basic Smelter, which accepts Wood Logs, Charcoal, and Spark Powder as fuel. Wood Logs burn fast and yield low heat, so feeding them into a Smelter to process Copper Ore or Iron Ore means you will burn through stacks of logs for very little output. Charcoal, produced at the Carpenter's Kiln from Wood Logs, burns longer and hotter, making it the practical choice for sustained smelting runs and Forge work. Spark Powder is reserved for Enchanted recipes and should never be wasted on ordinary ore. Matching your fuel to the job at hand — Charcoal for routine bars, Coal once you can mine it, Spark Powder only for magic-tier crafts — keeps your stockpile of ore and ingots from disappearing faster than you can gather them.
| Fuel Type | Burn Efficiency | Best Use Case |
|---|---|---|
| Charcoal | High | Sustained smelting, forge work |
| Wood Logs | Low | Emergency only |
| Coal | Very High | Late-game bulk smelting |
| Spark Powder | Special | Enchanted recipes |
Charcoal remains the workhorse fuel for most of the game because it is renewable through the carpenter's kiln and cheap to produce in bulk. Coal is better once you can mine it reliably, but early on it is too scarce to burn casually.
Blast Furnace and Late-Game Station Upgrades
The blast furnace is the endgame upgrade to your smelting line, and it changes how you think about bulk production. Where the basic smelter handles one recipe at a time with modest yields, the blast furnace processes ore faster and unlocks recipes that the standard smelter simply cannot touch.
According to the Enshrouded 1.0 changelog, crafting progression was rebalanced to remove unnecessary resource grind, and station yields were raised while production times were cut. That rebalance makes the blast furnace far more attractive than it was during early access, because the throughput gain now translates directly into saved playtime.
What the blast furnace unlocks goes well beyond faster smelting — it is the gate that separates mid-game crafting from the late-game ceiling. In practice, that means bulk ingot production at multiple bars per fuel cycle, advanced alloys whose recipes the standard smelter cannot touch, higher-tier tool components, and the gem processing chain that the 1.0 update wired into spell charge recipes. Because the 1.0 rebalance raised station yields and cut production times, every one of these unlocks compounds: the same charcoal and ore pipeline you fed from your carpenter-built workshop now returns more usable output per run, so the blast furnace pays for itself in saved farming trips rather than raw stats alone.
-
Bulk ingot production — multiple bars per fuel cycle
-
Advanced alloys — recipes gated behind the upgraded station
-
Higher-tier tools — components that feed late-game gear
-
Gem processing — the 1.0 update added mined gems to spell charge recipes, and the blast furnace supports that chain
The blast furnace also pairs naturally with the gem forge station mentioned in the 1.0 changelog, which can be placed in the late game. Together they form the top of your crafting pyramid, and both depend on the same fuel and ore pipeline you built back at the carpenter.
When to Build the Blast Furnace
Do not rush it. The blast furnace demands a significant material investment, and building it before your ore supply is stable just means an expensive station sitting idle. A reasonable trigger is when you can consistently feed your basic smelter without running dry — at that point, the upgrade pays for itself quickly.
Players who want to survive the deeper Shroud regions while gathering late-game ore should also shore up their defenses; the max health guide explains how to build a character that can take a hit when a gathering run goes wrong.
Station Progression Checklist
Use this checklist to keep your crafting pipeline on track. It is ordered by the sequence that avoids bottlenecks in a typical playthrough. The ordering matters because Enshrouded gates each station behind the previous one's output: the kiln's charcoal feeds the smelter, the smelter's ingots feed the forge, and every one of those builds consumes refined wood from the carpenter. Skipping ahead — placing the forge before your charcoal line is running — leaves you burning raw logs for fuel and stalled on ingot production. Work top to bottom and you will never idle a station waiting on a reagent you have not unlocked yet.
- Rescue Cade Hawthorn and place the carpenter station
- Build a kiln and start charcoal production
- Rescue the hunter and set up the hunter workshop
- Establish the farmer workshop for renewable reagents
- Place the collector bench and begin catalog turn-ins
- Build the smelter and connect it to your fuel supply
- Add the forge and start producing ingots into gear
- Upgrade to the blast furnace once ore flow is stable
- Add the gem forge station for late-game spell charges
Cade Hawthorn's carpenter station is the single gate every other crafting bench passes through, because Refined Wood — produced by feeding logs into the carpenter — is a hard ingredient in the kiln, the smelter, the forge, and the blast furnace alike, not to mention the beds, doors, and storage chests that keep your base functional. That dependency is exactly why the checklist opens with his rescue: park a kiln before the carpenter is running and you are left burning raw logs at a fraction of charcoal's efficiency, and the smelter downstream never receives a single ingot to work with.
Frequently Asked Questions
Do I need the carpenter before I can build a forge?
Yes. The forge requires refined materials and a fuel supply that trace back to the carpenter's kiln. Building a forge first leaves you unable to craft the ingots it needs, so rescue Cade Hawthorn and set up his station before investing in metalworking.
What does the hunter workshop actually produce?
The hunter workshop converts raw pelts and bones into treated leather, sinew cord, cured hide, and bone fragments. These materials feed armor recipes, ranged weapons, and several collector catalog entries, making the hunter bench a core part of any crafting-focused base layout.
Is the collector worth building early?
It is worth placing as soon as you have spare materials, because catalog turn-ins reward recipes and cosmetics that are otherwise unobtainable. Community reports suggest most players neglect the collector, which means they miss mid-game recipes that would have smoothed their progression considerably.
How much charcoal does a smelter burn per ingot?
Fuel consumption varies by recipe and station tier, and the 1.0 rebalance adjusted production times and yields. As a rule, keep a kiln running continuously so your smelter never stalls waiting for fuel, and switch to coal once you can mine it in bulk.
When should I upgrade to the blast furnace?
Build the blast furnace once your basic smelter runs continuously without ore shortages. It processes ore faster, unlocks advanced alloys, and supports the gem processing added in the 1.0 update, but it is a poor investment if your gathering pipeline cannot keep it fed.
The carpenter is the quiet foundation of everything you build in Enshrouded, and the stations that follow — hunter, farmer, collector, forge, smelter, and finally the blast furnace — only work as well as the pipeline feeding them. Keep the kiln burning, balance your bench tiers, and upgrade in sequence, and your base will produce gear faster than the Shroud can take it away.